by TRA
The Pentacon
Tripod
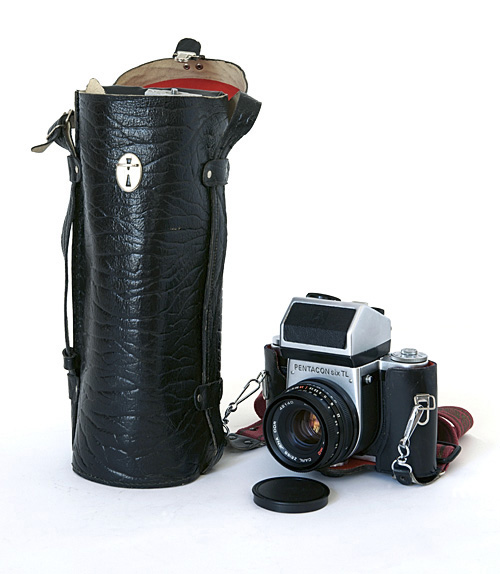
The Pentacon tripod in its case
[ptpd01.jpg]
One accessory in the Pentacon catalogue
is often neglected by those interested in the Pentacon
Six: the Pentacon tripod. However, a tripod is
essential for some sorts of photography, and Pentacon’s
offering merits serious consideration.
| This tripod is
usually supplied in a leather case with a strap
for carrying it by hand and an extension that
converts this into a shoulder strap. When
packed, it is quite small, and will even fit
inside some backpacks. That was how I
carried it for a number of days in Berlin in
2006.
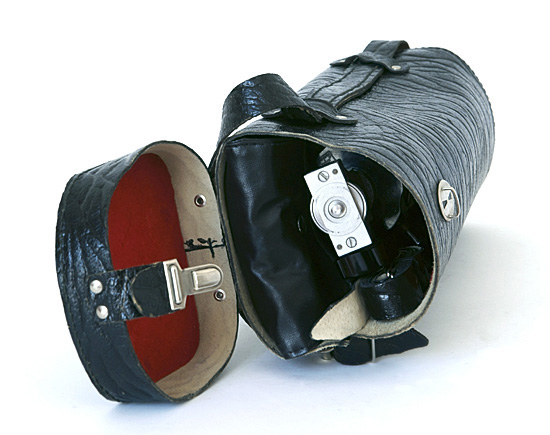
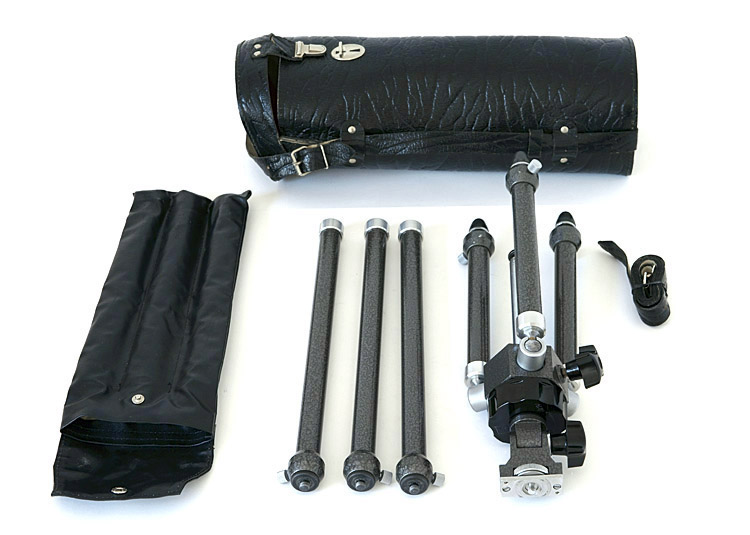
However, unpacking the case
reveals a number of components: |
 This gives an idea of the size of the Pentacon tripod when it is packed away in its case. [ptpd02.jpg] |
[ptpd03.jpg]
The basic tripod
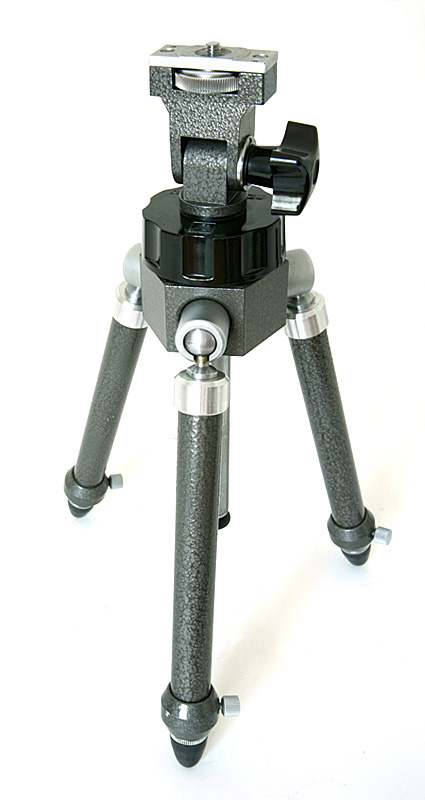 Without the leg extenders, at minimum extension you have a lovely table-top tripod that is 32.3 cm / 12¾" high. [ptpd04.jpg]
|
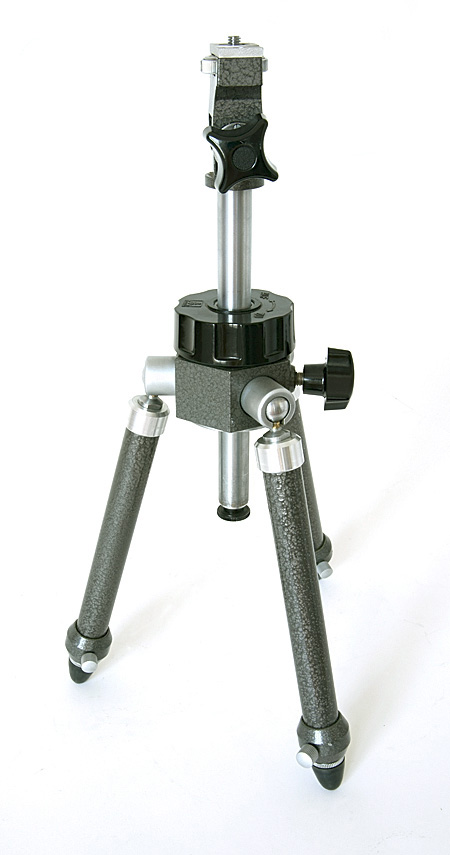 There is a rising centre column that increases this height to 45 cm / 17¾". In this picture, the centre column is here seen partially raised. [ptpd05.jpg] |
For the minimum height of this tripod, with the legs splayed out, see here.
|
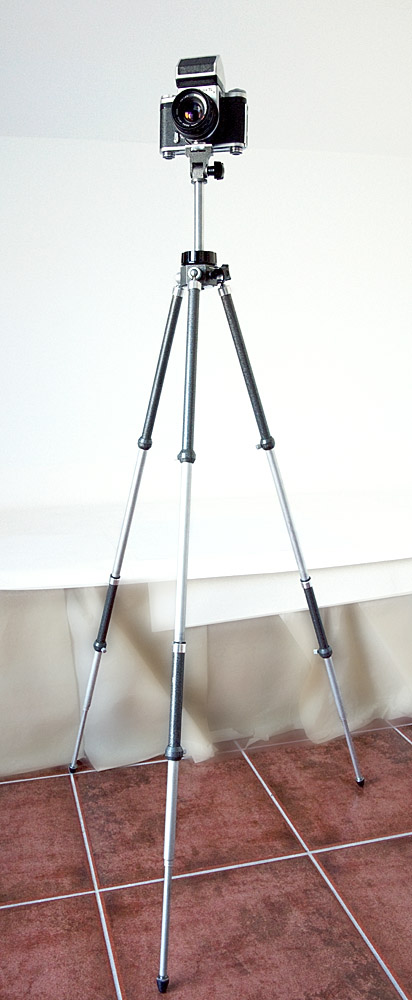
All height measurements on this page were made with the angle of the legs as in picture ptpd10.jpg (see picture below in which the red floor tiles are visible). For the other measurements, the angle of the legs was not changed, even though this may not necessarily always correspond exactly to the angles seen in the accompanying pictures. |
| Extending the legs on this “mini tripod” and raising the centre column to its maximum height, you reach a height of 60.5 cm / 23¾" | 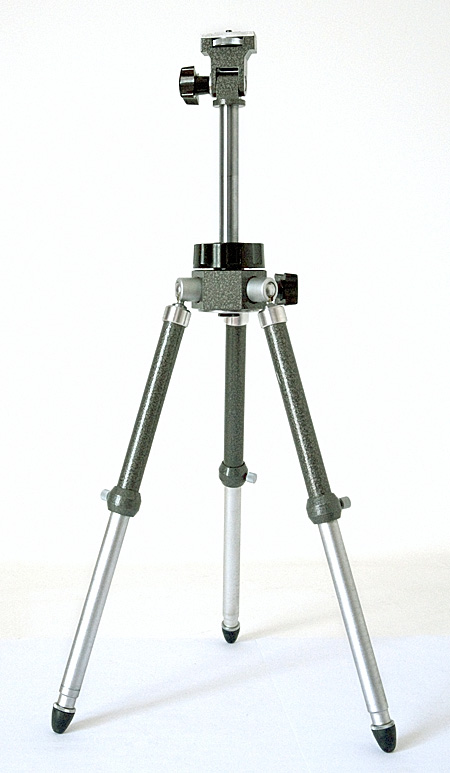
|
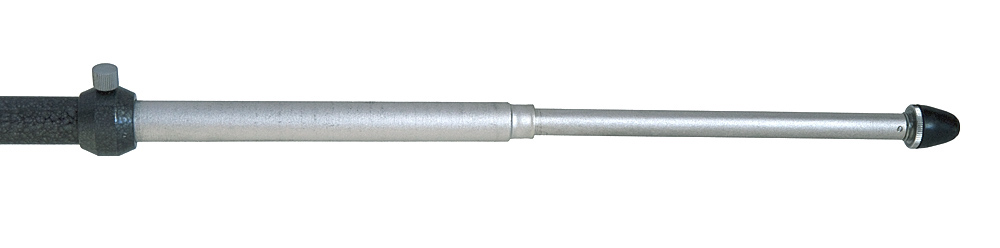
But if you examine the bottom of the legs carefully, you see a knurled ring just above the rubber feet. Does this take the rubber off and reveal spikes? No. It extends the legs even further:
[ptpd06.jpg]
|
With only the
small legs, the tripod now reaches a height of
76.7 cm / 30¼".
(See image to the right) The leg extenders However, it is with the leg
extenders that this “mini tripod” becomes a
full tripod. Unscrew the three legs,
screw the extenders in their place, and screw
the original legs on the end of the extenders
and you have a tripod that has a minimum
height of 64 cm / 25¼", with the legs fully
collapsed and the centre column down. |
 The basic tripod at maximum height [ptpd07.jpg] |
 [ptpd09.jpg] |
The leg extenders do themselves
extend (only once, as far as I can see!).
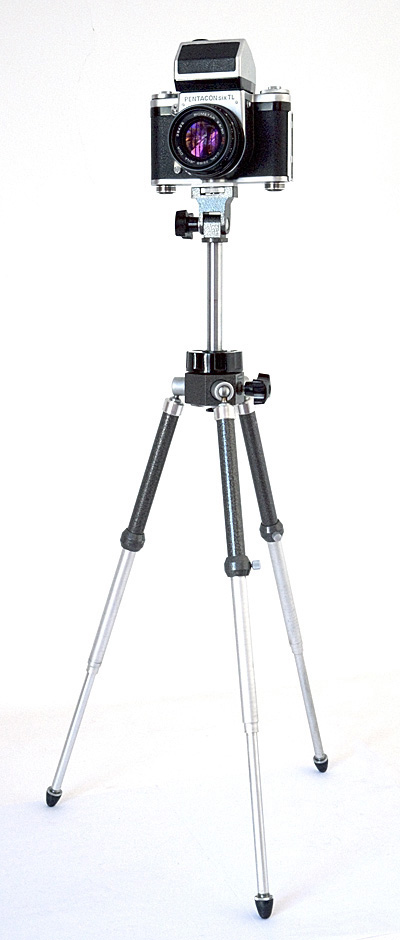
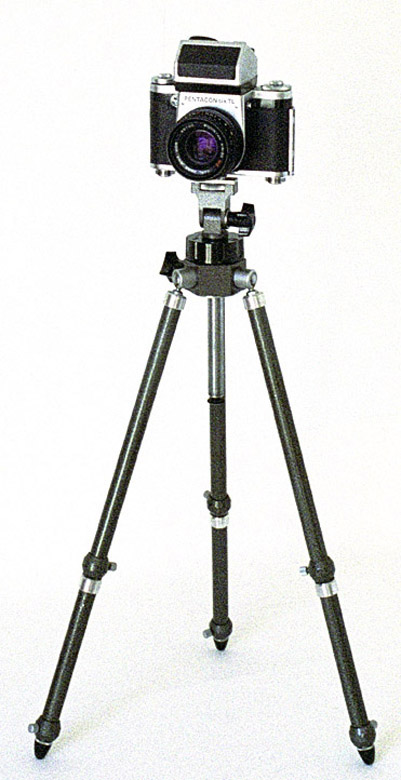
With the leg extenders extended, and the
original legs extended just once, the tripod
reaches a height of 1m 19.5 cm / 47", with the
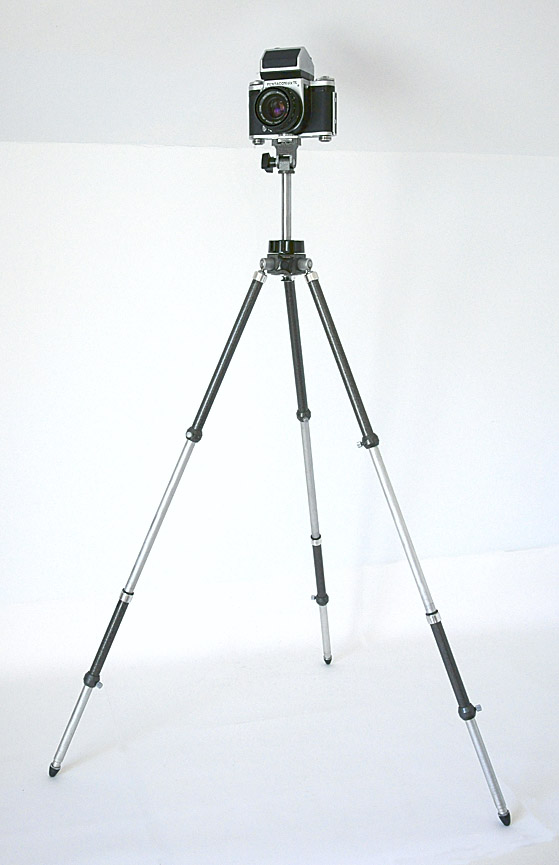
centre column raised. (See image to the left) When the
original legs are extended a second time and
the column is raised,
the tripod reaches a height of 1m 36cm / 53½". The tripod will no longer fit on my studio work surface, with the sloping ceiling above. (See image to the right) |
 [ptpd10.jpg] |
But the flexibility and versatility of this tripod does not end here. Two further features extend its potential considerably:
- the centre column can be reversed, so that the camera can be attached under it
- the legs can be spread out almost to horizontal.
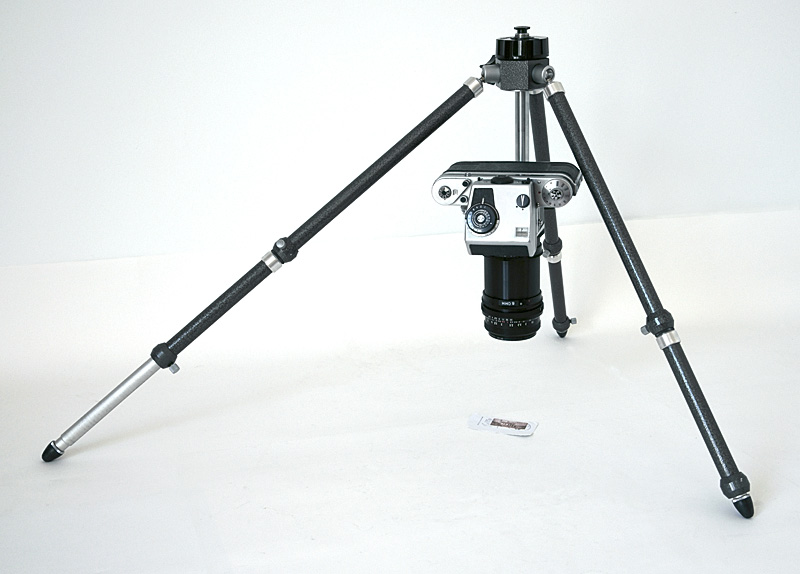
In this position you can copy documents
and photograph other two- and three-dimensional items,
even if you don’t have a copying stand.
[ptpd11.jpg]
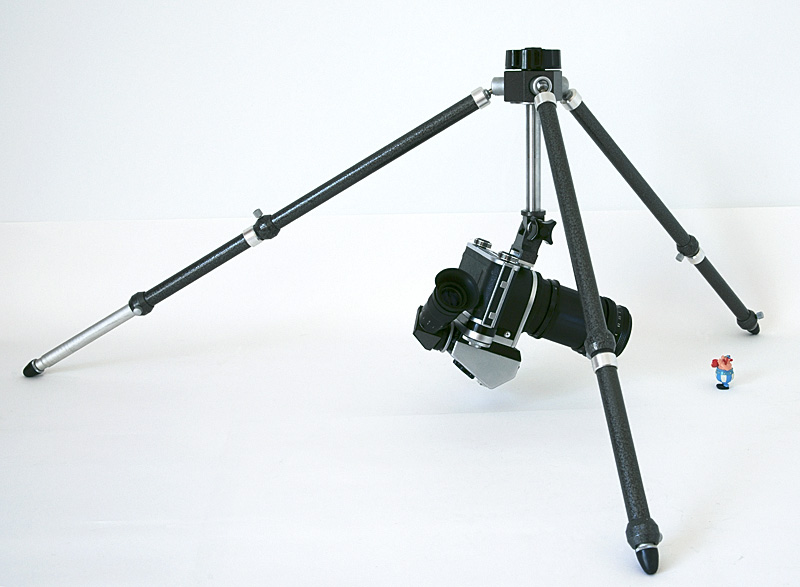
Getting down to work. Here the
tripod has been set up to enable the Pentacon Six to
photograph a tiny plastic toy.
But it could be a bug, a flower, a frog
or anything that interests you.
[ptpd12.jpg]
This can be rotated horizontally, raised
and lowered. That’s all. There is no ball
head, no tilt and pan levers, no complicated
multi-locking; just one lockable bolt. However, in
practice, this provides virtually all the flexibility
that one could want with a 6×6 camera.
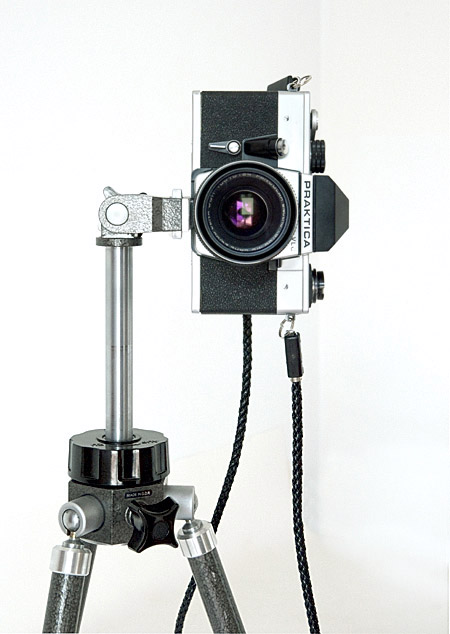
| How does one shoot
vertical shots with a 35mm camera, using
this tripod? Raise the centre column, at least a little, swing the head over so that the mounting surface is vertical. Turn the camera into vertical orientation and attach it to the tripod head. It needs to be attached tightly, or the front of the camera may sag, especially with a long lens. You will probably then need to turn the centre column (or the whole tripod), so that you are back pointing where you were before. (See
image to the right)
|
 [ptpd13.jpg] |
Verdict
This really is 1950s technology at its best: simple, solid and strong, with virtually nothing that can go wrong. I have found this tripod more than adequate for general photography with the Pentacon Six. When everything is tightened up, it is solid and stable. It should be fine with lenses up to 300mm, perhaps even up to 500mm, though I have not yet tried that. If you plan to use the 1000mm mirror lens, see a more suitable tripod for that lens here.
Just remember to check that the leg
extenders are included before buying one! (These
are called “Beinverlängerungen” in German.)
To return to the accessories page, click here.
To choose other options, click below.
Home
© TRA November 2010
Latest revision: June 2023